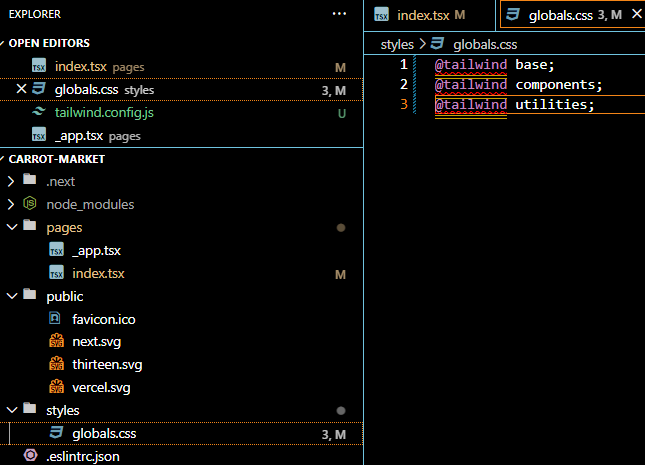
22.4 Preview Deployments

바로 배포 시키기 전에 preview 할 수 있어야 하겠지?
깃에서 브랜치 따서 push 하면 알아서 배포가 된다.
일단  enter-message라는 이름의 깃 브랜치를 따자.

git checkout -b enter-message

그리고 코드 수정하고 바로 커밋하면

git add .
git commit -m "New Welcome Msg"
git push origin enter-message

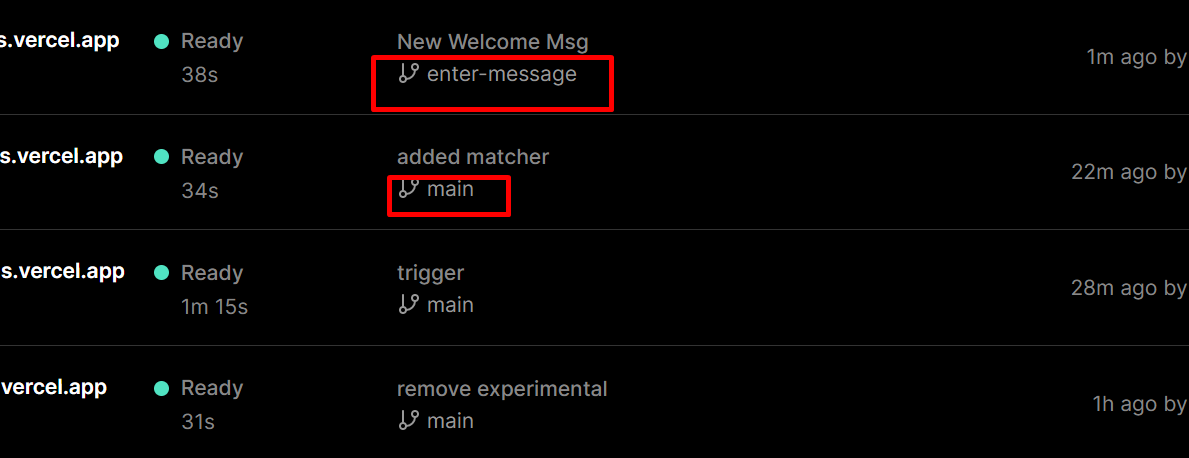
브랜치에서 보낸 코드가 빌드 되고, 볼 수 있는 preview 도메인이 생긴다.
그리고 prod로 배포 하려면
promote to production 누르면 끝!


22.5 Limits in Vercel
https://vercel.com/docs/concepts/limits/overview

<Image> 태그 사용할 때만 해당.

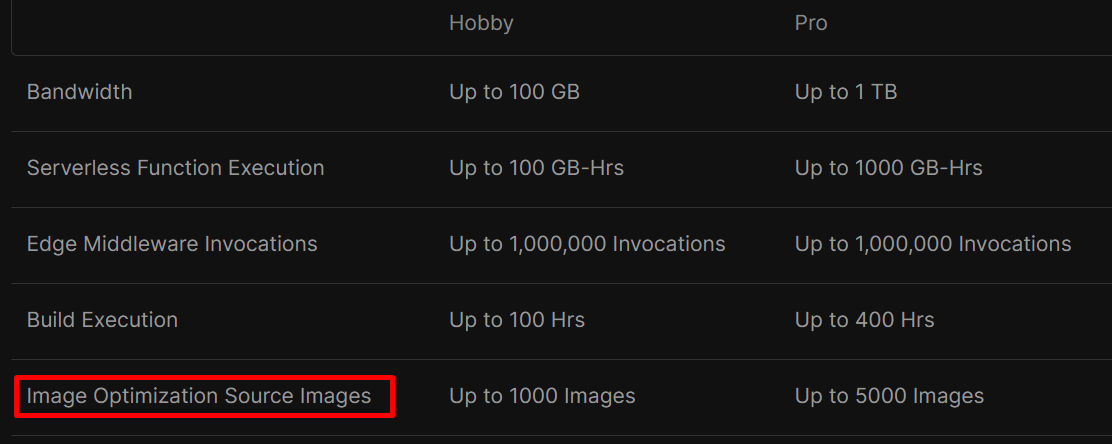
Edge Middleware Invocations는 middleware.ts임
한달에 100만회로 제한. 알아서 잘 활용해라.

역시 제한이 있다.

아래로 가면 내 앱의 사용현황을 볼 수 있다.
https://vercel.com/dashboard/usage

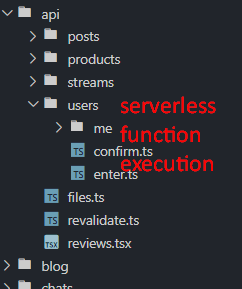
근데 serverless function은 revalidate할 때도 카운팅 되기 때문에 조심해라.
https://vercel.com/docs/concepts/limits/usage#invocations

19.0 Blog Section
기본적으로 페이지가 서버사이드 렌더링을 하지 않을 때, 또는 API에서 데이터를 가져오지 않을 때, 
그건 누구에게나 정적 코드로 보인다. 데이터는 이미 HTML에 있기 때문.
nextjs는 html을  export해준다. = 빌드될 때 생성된다. 
nextjs로 Markdown 파일(.md)만 써서 블로그 섹션을 만들 수 있다
let's get started!

19.10 getStaticProps
getServerSideProps() 처럼 서버에서 실행된다. 유저의 요청이 발생할 때마다 일어남.
getStaticProps() 딱 한 번 실행 됨.
페이지가 빌드되고 nextjs가 이 페이지를 export 한 후 일반 html로 될 때 실행됨.

front matter = 마크다운 파일에 관련된 데이터를 제공해줌

npm install --save gray-matter

문자열 또는 파일에서 front-matter을 파싱

결과물
코드


build된 file을 보면 짤렸긴 한데 blog에는 SSG라는게 붇는다.
Static Site Generation!


부연설명 - 닉네임 sugar
getStaticProps getStaticProps는 항상 서버에서 실행되고 클라이언트에서는 실행되지 않습니다.
getStaticProps는 정적 HTML을 생성하므로 들어오는 request(예: 쿼리 매개변수 또는 HTTP 헤더)에 액세스할 수 없습니다.
getStaticProps가 있는 페이지가 빌드 시 미리 렌더링되면 페이지 HTML 파일 외에도 Next.js가 getStaticProps 실행 결과를 포함하는 JSON 파일을 생성합니다.
readdireSync() 디렉토리(폴더)의 내용을 읽습니다.
readFileSync() path의 내용을 반환합니다.

19.2 Dynamic Imports
유저가 실제 그 컴포넌트를 사용할 것이라고 판단 될 때만 불러오는 것.

import dynamic from "next/dynamic"
const Bs = dynamic(() => import("@components/bs"), { ssr: false });
//이런 식으로 Bs 불러서 사용하면 됨.

// 서버단에서 로딩하지 않게 설정 가능.
// 서버에서 로딩한다면 파일위에서 컴포넌트 불러오고 렌더링 해주면
// nextjs는 서버단에서 일반 HTML로 export 해줄거야.
// 그러나 몇몇 라이브러리는 서버단에서 로딩하는게 불가능함. 그래서 서버단에서 불러오면 에러가 생가겠지.
// 이게 위처럼 {ssr:false}가 필요한 상황임.

props는 원래 하던대로 넣으면 됨. typescript에서 complain하지만 상관없음.
<>
  <Bs hello={true} />
  <Input
    name="phone"
    label="Phone number"
    type="number"
    kind="phone"
    required
    register={register("phone")}
  />
</>

물론 모든 컴포넌트를 다 dynamic으로 하지는 마라. 그럼 로딩이 오히려 이상해지겠지.

19.3 Lazy-load Imports 
만약 Dynamic import가 너무 오래걸린다면? 
loader 컴포넌트를 줄 수 있다.
3초동안 컴포넌트를 불러오는 동안, 옵션을 줄 수 있다.
아래는 dynamic 함수 사용하는거고.

const Bs = dynamic(
   () =>
     new Promise((resolve) =>
       setTimeout(() => resolve(import("@components/bs")), 3000)
     ),
   { ssr: false, loading: () => <span>Loading a big component for you!</span> }
 );


아래는 React18 부터 도입된 suspense기능을 사용하기 위한 설정.
true로 해놓으면 됨. 그리고 컴포넌트를 엘리먼트 부분에서 컨트롤 하는거

const Bs = dynamic(
  () =>
    new Promise((resolve) =>
      setTimeout(() => resolve(import("@components/bs")), 3000)
    ),
  { ssr: false, suspense: true }
);
 <>
  <Suspense fallback={<span>Loading something big</span>}>
    <Bs />
  </Suspense>
  <Input
    name="phone"
    label="Phone number"
    type="number"
    kind="phone"
    required
    register={register("phone")}
  />
</>


미들웨어란?
Request ----> Server ----> 서버내 함수(handler = controler()) ----> DB

그런데 로그인이랑 인증 요청을 처리하려면
컨트롤러 전에 믿르웨어를 사용해야 함.
Request ----> Server ----> 1. log() ----> 2. auth() -----> 서버내 함수(handler = controller()) ----> DB

아래 두개가 미들웨어
1. log(): 요청사항을 log해주는 함수
2. auth(): 인증쿠키 처리해주는 함
여기서 틀린게 없으면 인증 미들웨어가 controller에게 요청사항을 전달해줌

중간에 있느 소프트웨어지
어떤 중간에?
처음 유저가 보낸 request와 종착지(controller) 중간에 있는 함수!!!

node.js에서 많이 사용함.
server 파일이 따로 있음.
이 파일안에 사용하고 싶은 미들웨어들을 정리해놓음

근데 next.js는 서버리스임. server파일 없다.
근데 미들웨어 사용 가능!!!

client/useUser hook 모든 페이지에 사용해야 하는데. 이런걸 미들웨어로 만들어야지

pages폴더
루트폴터 안에 미들웨어 함수 적으면 됨.(12.2.0부터 루트에) middleware라고 적음 됨.
코드를 어디에 적느냐에 따라 스코프 설정이 됨.
페이지 바꿀 때마다 동작하게 하고싶다? -> 루트폴더에 미들웨어 작성
또는 프로파일 폴더 안에서만 움직일 때 동작하게 하고싶다? 해당 폴더에 미들웨어 작성
https://nextjs.org/docs/messages/nested-middleware

import type { NextRequest, NextFetchEvent } from "next/server";

export function middleware(req: NextRequest, ev: NextFetchEvent) {
  if (req.nextUrl.pathname.startsWith("/about")) {
    // This logic is only applied to /about
  }

  if (req.nextUrl.pathname.startsWith("/dashboard")) {
    // This logic is only applied to /dashboard
  }
}

이제 그냥 루트에 있는 미들웨어 파일하나로 다 써야함. 경로로 구분 하면 됨.


middleware.ts라는 이름의 파일을 root에 만들어라.

middleware
1. API 핸들러에 요청 보낼 때도 실행 됨.
2. 페이지 이동할 

19.1 Responses and Redirections

import { NextFetchEvent, userAgent } from "next/server";
import type { NextRequest } from "next/server";
import { NextResponse } from "next/server";

export function middleware(req: NextRequest, ev: NextFetchEvent) {
  const ua = userAgent(req);
  // console.log(ua);
  // if (ua?.isBot) {
  //   return new Response("Please don't be bot"); //no longer works
  // }
  if (!req.url.includes("/api")) {
    if (!req.url.includes("/enter") && !req.cookies.has("carrotsession")) {
      return NextResponse.redirect(new URL("/enter", req.url));
    }
    // if (req.nextUrl.pathname.startsWith("/chats")) {
    //   console.log("chats");
    // }
  }
  // req.geo?.country
  // hosting provider 에 따라 다름.
}

16.0 Introduction
next.js에서는 img 태그 쓰지마라.
<Image> 써라.

import Image from 'next/image'
import profilePic from '../public/me.png'

function Home() {
  return (
    <>
      <h1>My Homepage</h1>
      <Image
        src={profilePic}
        alt="Picture of the author"
        // width={500} automatically provided
        // height={500} automatically provided
        // blurDataURL="data:..." automatically provided
        // placeholder="blur" // Optional blur-up while loading
      />
      <p>Welcome to my homepage!</p>
    </>
  )
}

이미지 import해서 변수처럼 쓰면된다.

https://nextjs.org/docs/basic-features/image-optimization

Improved Performance: Always serve correctly sized image for each device, using modern image formatsVisual Stability: Prevent Cumulative Layout Shift automatically
Faster Page Loads: Images are only loaded when they enter the viewport, with optional blur-up placeholdersAsset Flexibility: On-demand image resizing, even for images stored on remote server


16.1 Local Images
local image와 remote image 다루는게 다르다.
blurry 버전의 이미지 기능은 local image만 가능. 파일을 갖고있어야 함.
_next/image API Handler로 이미지 

http://127.0.0.1:3000/_next/image?url=%2F_next%2Fstatic%2Fmedia%2Flocal.a1148338.jpg&w=3840&q=75
뒤의 Q는 퀄리티. 1~100까지.

blurry 이미지 적용하기  = placeholder에 blur적으면 됨.

<Image src={myImage} placeholder="blur" quality={100}/>


16.2 Remote Images
API로 받아오는 이미지 최적화 어떻게 하는지 알아보자.
nextjs는 이미지 서버를 물어본다.
next.config.js에 다음과 같이 작성.
imagedelivery.net은 cloudflare의 서버임.

/** @type {import('next').NextConfig} */
const nextConfig = {
  reactStrictMode: true,
  images: {
    domains: ["imagedelivery.net"],
  },
};

module.exports = nextConfig;

근데 또 에러 뜸

Server Error

Error: Image with src "https://imagedelivery.net/0dNSIQsfAsyuUaSo7XjPgQ/undefined/public" is missing required "width" property.

16.3 Layout Fill
next.js는 이미지 사이즈를 알아야 한다. URL에 실제로 width넣을 필요 없음.
실제 화면에 보여질 사이즈만 알면 된다.

next.js는 내 서버에 이미지를 요청하고, 내가 태그에 적은 사이즈대로 이미지 생성 함.
그래서 실제 사용하는건 cloudflare에 있는게 아님.
로컬처럼 cloud 서비스 사용함.
https://nextjs.org/docs/api-reference/next/image#fill

<div className="relative pb-80">
    <Image
      src={`https://imagedelivery.net/0dNSIQsfAsyuUaSo7XjPgQ/${data?.product?.image}/public`}
      className="h-96 bg-slate-300 object-sacle-down"
      fill
    />
    <h1 className="absolute w-full text-center text-red-500">Hi there</h1>
  </div>

위처럼 relative주면 Image는 기본적으로 abolute라서 안보이게 할 수 있고,
위 태그 처럼 하면 배경이미지로 사용가능.
그리고 object-fit 사용하면 아주 좋음.
https://developer.mozilla.org/en-US/docs/Web/CSS/object-fit


object-fit - CSS: Cascading Style Sheets | MDN

The object-fit CSS property sets how the content of a replaced element, such as an <img> or <video>, should be resized to fit its container.

developer.mozilla.org

근데 next.js 13부터는 좀 바뀜
https://nextjs.org/docs/api-reference/next/legacy/image#layout


next/legacy/image | Next.js

Backwards compatible Image Optimization with the Legacy Image component.

nextjs.org

16.4 Conclusions:
remote image 작업할 경우.블러 효과 할 수 없음.
blurDataURL= 이런식으로 가능... 근데 굳이.

'클론코딩-캐럿마켓 > 전반' 카테고리의 다른 글

17 LIVE STREAMING, 18 Code Challenge  (0) 2023.01.13
15 CLOUDFLARE IMAGES - 사진 다루기  (0) 2023.01.11
14 Streams - seeding  (0) 2023.01.11
13 Profile  (0) 2023.01.09
12 동네생활  (0) 2023.01.06

12.0 Models
포스트와 그 포스트에 대한 궁금증과, 답변, 궁금해요 모델 추가.

model Post {
  id         Int         @id @default(autoincrement())
  created    DateTime    @default(now())
  updated    DateTime    @updatedAt
  user       User        @relation(fields: [userId], references: [id], onDelete: Cascade)
  userId     Int
  question   String      @db.MediumText
  answers    Answer[]
  wonderings Wondering[]

  @@index([userId])
}

model Answer {
  id      Int      @id @default(autoincrement())
  created DateTime @default(now())
  updated DateTime @updatedAt
  user    User     @relation(fields: [userId], references: [id], onDelete: Cascade)
  userId  Int
  post    Post     @relation(fields: [postId], references: [id], onDelete: Cascade)
  postId  Int
  answer  String   @db.MediumText

  @@index([userId])
  @@index([postId])
}

model Wondering {
  id      Int      @id @default(autoincrement())
  created DateTime @default(now())
  updated DateTime @updatedAt
  user    User     @relation(fields: [userId], references: [id], onDelete: Cascade)
  userId  Int
  post    Post     @relation(fields: [postId], references: [id], onDelete: Cascade)
  postId  Int

  @@index([userId])
  @@index([postId])
}


12.1 Forms and Handlers
12.2 Post Detail
12.3 궁금해요
12.4 Answer
12.5 All Posts

12.6 useCoords
12.7 Geo Search
12.8 Geo Bug


const posts = await client.post.findMany({
        include: {
          user: {
            select: {
              id: true,
              name: true,
              avatar: true,
            },
          },
          _count: {
            select: {
              wonderings: true,
              answers: true,
            },
          },
        },
        where: {
          latitude: { gte: parsedLatitude - 0.01, lte: parsedLatitude + 0.01 },
          longitude: {
            gte: parsedLongitude - 0.01,
            lte: parsedLongitude + 0.01,
          },
        },
      });


Type 'number' is not assignable to type 'null'.ts(2322)
해결 null as any로 바꾸면 된다는데

 
next.js에서는 페이지를 미리 만들어 놓기 때문에, 초기값으로 그려진다.

그래서 longitude, latitude가 null이었으니 제대로 동작 안하지. 


'클론코딩-캐럿마켓 > 전반' 카테고리의 다른 글

14 Streams - seeding  (0) 2023.01.11
13 Profile  (0) 2023.01.09
11 Products  (0) 2023.01.04
10 AUTHORIZATION - SWR  (0) 2023.01.04
9 AUTHENTICATION  (0) 2022.12.27

nextjs 셋업

https://nextjs.org/docs/getting-started

타입스크립트 사용하는 nextjs 어플 설치(react18버전이 정식출시된 상태라 딴짓 할 필요 없음. 아래처럼 하면 됨.)
타입스크립트 싫으면 --typescript 빼고.

npx create-next-app@latest --typescript


공식 릴리즈 전 코드상태 3단계
1. Alpha
2. Beta
3. RC(Release Candidate)
RC는 확정된 버전임. 다만 오류같은거만 수정하겠지.
강의 당시의 리액트 18은 RC이고, 지금은 정식버전이다.
RC버전 따로 설치하는 방법 있음.

넥스트13, 리액트18
무사히 설치 후 npm run dev 해본 화면 크...멋지

tailwindcss, postcss, autoprefixer 설치

npm install -D tailwindcss postcss autoprefixer


npx tailwindcss init -p


아래 처럼 파일 두개가 생김

참고,
NPM - node package manager
NPX - node package execute
NPX는 Run a command from a local or remote npm package
npm 패키지의 커맨드를 실행 시키는 명령어.
npx는 npm run과 비슷하다는 것.
-p는 npm에서 package의 줄임말.
-p옵션으로 특정된 패치지는 실행 명령의 path에 포함이 된다 = 같이 섞여서 바로 실행된다(?)
로컬 프로젝트에 해당 패키지가 없으면, 실행된 프로세스의 PATH 환경 변수에 추가된,  npm 캐시 안의 폴더에 설치된다.
즉, 바로 설치하고 실행 시킨다는거 같음.

https://docs.npmjs.com/cli/v7/commands/npx


아래처럼 두개가 생김 postcss.config.js 는 안건드려도 됨

tailwind.config.js를 아래처럼 수정해준다.

/** @type {import('tailwindcss').Config} */
module.exports = {
  content: [
    "./pages/**/*.{js,jsx,ts,tsx}",
    "./components/**/*.{js,jsx,ts,tsx}"],
  theme: {
    extend: {},
  },
  plugins: [],
}
//tailwind를 어디에서 사용할 것인가 설정
//./pages/**/*.{js,jsx,ts,tsx}의 의미는
//page폴더 아래 모든 폴더(**)의 모든 파일(*)에서 {}안의 확장자들.

그리고 global.css에 아래 내용을 추가한다.

아래 다 있음.
https://tailwindcss.com/docs/installation/using-postcss

계속...

+ Recent posts